

This article will provide step-by-step instructions on how to install Windows 10 using a USB flash drive. The article is divided into the following parts to make the installation process easier.
- Requirements
- Creating the Windows 10 Bootable USB
- Installing the Windows using the Bootable USB
Requirements: What we Need
- Internet access: Internet access is required for downloading the Windows 10 installation image.
- USB Pen Drive: A USB Pen Drive with at least 8GB of space.
- Working Windows 10 PC/Laptop- This is required to create a bootable Windows 10 USB for installation.
System requirements for installing Windows 10
Mentioned below is the minimum required configuration for installing Windows 10 on your PC/Laptop.
- Processor: 1 GHz or faster CPU.
- RAM: 2 GB or more.
- Storage: 20 GB or more for 64-bit Windows 10.
- Display: Monitor or Laptop display with a minimum resolution of 800x600 pixels.
Creating the Windows 10 Bootable USB
To install Windows 10 using a USB, you need to make your USB flash drive bootable.
Follow the steps below to make your USB flash drive bootable.
- Visit the Windows 10 download website using this link and click on the Download tool now to download the Media Creation Tool issued by Microsoft.

- Once the tool is downloaded, open it on your computer, and you will see the following response when the tool is launched

3.Click on Accept, and in few seconds, you will be prompted to do two things. Upgrade your PC or Create installation media (USB flash drive, DVD, or ISO file) for another PC).

4.Since we want to install windows 10 using a bootable USB, we will choose to Create installation media (USB flash drive, DVD, or ISO file) for another PC and click the Next button.
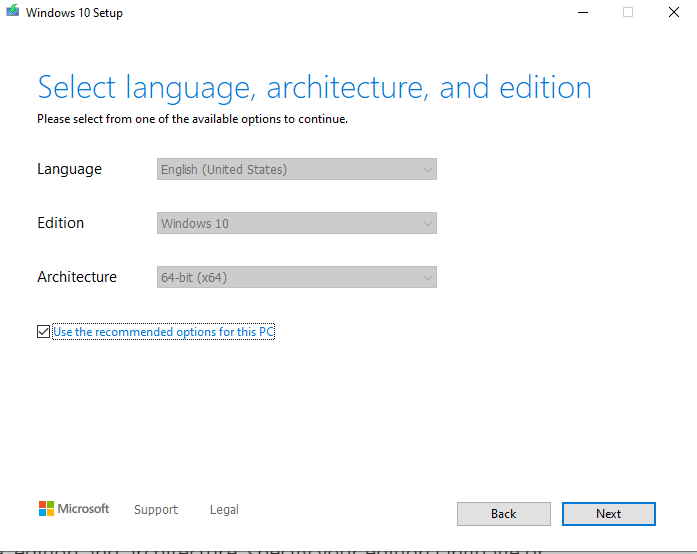
5.Now, you will be prompted to choose the preferred language, edition, and architecture, specify your edition, language, or architecture if known otherwise, tick use the recommended options for this PC checkbox, and click the next button
6.Choose the USB flash drive as an installation media and click Next.
Note: Before choosing a USB flash drive, please plug your USB flash drive into your PC/Laptop.

7.Select your USB drive from the list

8.The tool will start downloading Windows Files to your USB drive and make it bootable for installation.

Note 1: Please backup all your USB flash drive data somewhere safe as the tool will format the USB flash drive and delete all the files
Note 2: The download of Windows 10 files may vary depending on your internet connection speed. Make sure you do not disconnect from the internet or turn off your computer during the process.
Installing the Windows using the Bootable USB
After the creation of the Bootable USB, you need to connect the USB flash drive to the computer on which you want to install Windows 10 and change its boot order.
The boot order of a particular computer can be changed by accessing its BIOS. To access the BIOS, the steps can vary between different PC manufacturers. If you do not know how to access your computer BIOS check your manufacturer's website for instructions and help.
- Once the boot order is changed through BIOS, you will be asked to press a key to boot from the USB.
- After that, you will be automatically redirected to Windows 10 installation wizard and will be prompted to choose the preferred language, time zone, currency, and keyboard settings. Specify them and click Next.

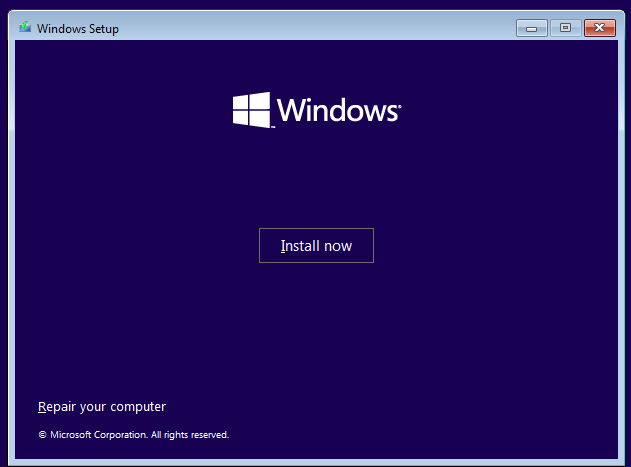
3.Click on Install Now Button
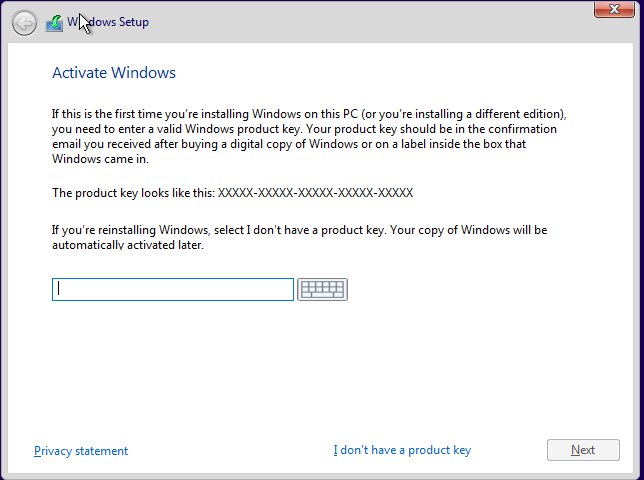
4 In a few seconds, you will be asked to enter your Windows 10 product key to activate your windows. If you have the product key handy, enter it; otherwise, click on I don't have a product key to activate your Windows 10 later using the product key.
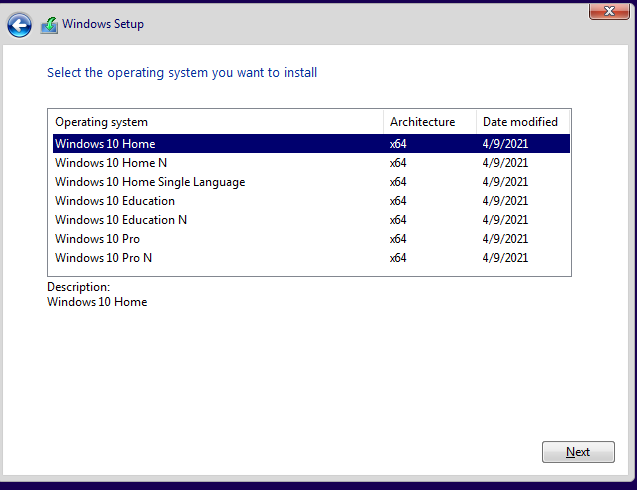
5.After that, you will be prompted to choose the windows 10 edition you want to install. If unsure which version of Windows 10 you require, check here
6.After choosing the windows 10 edition, click next, and you will be prompted to accept license terms. Read and check I accept the license terms checkbox to proceed further.

7.Choose Custom as a type of installation. The custom option does a fresh install of Windows 10 on your computer.

- You will be prompted now to provide hard drive space for installing Windows 10. Windows will auto-detect the hard drives available for installing and asks you to select one. Choose the one by clicking on the new button

9.Provide the partition size in MB, and select apply

10.Windows will automatically create two partitions; one by default is reserved for the system, and the other can be used for installing Windows 10 files
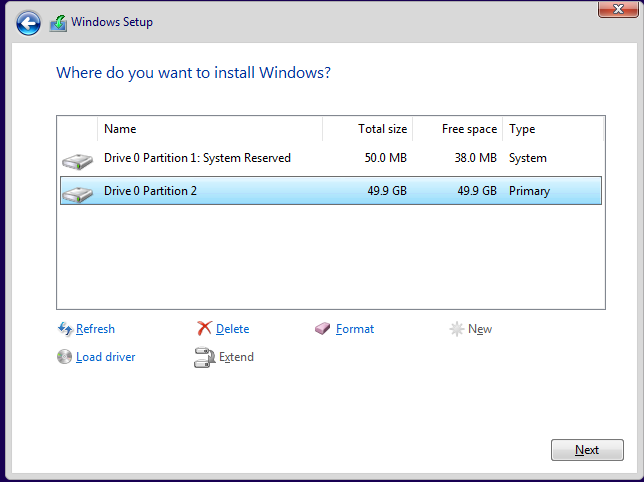
11.Choose the Second partition and click on Next. Windows installation will start, and you will see progress mentioned in percentages

12.The process may take few minutes, and your system will restart few times automatically.

14.Once completed, you will be redirected to the screen where you will be asked to choose your region. Select your region and click Yes.

- Windows will ask you to sign in using a valid email address, skype, or mobile number.

If you already have a Microsoft account, sign in using your credentials; otherwise, click on Create account
Follow the onscreen instructions for setting up an account, PIN, and other things.
19.After setting up your account, you will see a message. This might take several minutes. You don't have to do anything from here.

20.And in few minutes, you will be redirected to your Windows 10 desktop


